
The image management section is receiving a full upgrade that will redefine how images are managed in the SIDEARM platform. Currently in testing with a slated release schedule to begin in early November, the new features will help save you time with more robust editing tools and easier workflows to locate images for use. Here we will outline each change and what to expect when this update hits your site.
Image Management & Filtering

The image list has been redone to utilize our new style guide that has been popping up in other areas such as documents and galleries. In addition, this layout now provides real-time filtering in that results will show as each filter is selected or as you type into the keyword search area without needing to click a submit button. The keyword will search through image titles, alt text and file names.
Add Image / Batch / Zip

Some actions have been moved out of the left menu, including image category and photo credits which can be found in the top right corner of the image list area. This is also where you will now find the add image button.

When adding an image, you will then have the option to upload a single, batch or zip of images.
Single: This is your standard image upload, choose a single file and proceed to the editor.
Batch: This allows you to choose multiple images from your device to then label and upload.
Zip: This is where you will upload a zip file of images, such as head shots.
Image Editor

After adding or editing an image, the next step brings you do an all new editing tool with the option to crop, finetune, apply a filter, add text and resize the image.
Crop: click and drag to perform a manual crop, or choose from one of the preexisting horizontal or vertical options which includes your standard 16:9 ratio used for primary images.
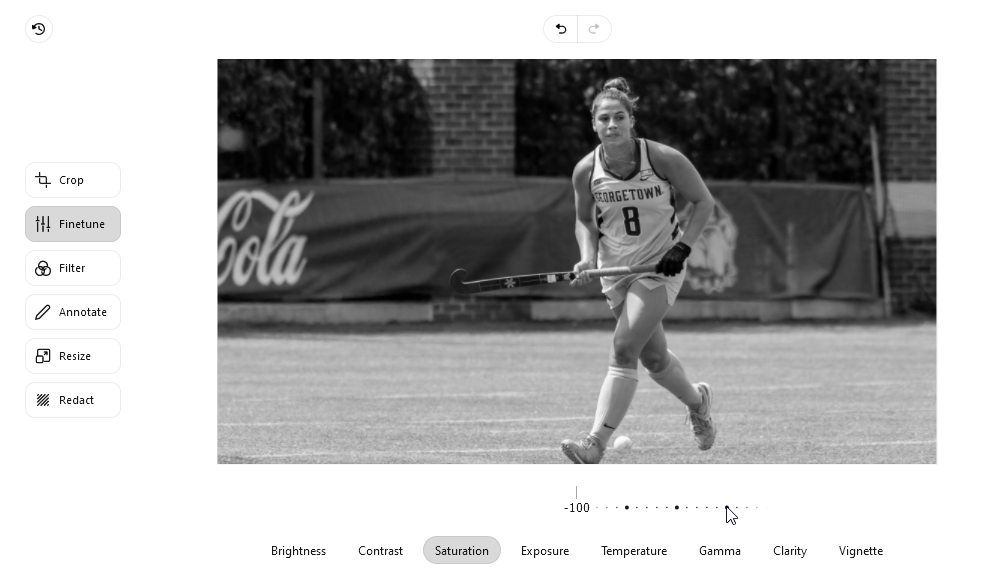
Finetune: This section allows you to adjust the quality of an image from brightness to temperature to clarity. Drag the scale slider to the left or right to adjust based on the category chosen.

Filter: Apply a preset filter to the image from the list shown.

Annotate: Here you can add text to an image or use one of the other options available.

Resize: To change the size of the image, enter the height or width and hit enter.
Image Versioning
A new addition to the platform is the ability to create versions or variants of existing images for use with stories and sport files. This replaces the insert image dialogue where you could resize image based on preexisting crops and ratios.
When selecting a primary image or inserting into the story body, you will be presented with the option to use the image as is or edit it. When editing, this will bring you to the image editor where you can make as many changes as needed. When finished, a new version of this image will be added to the left menu and then will always be available for future use without editing the original or creating a copy of it.
Here’s a quick walk-through of how this process works.
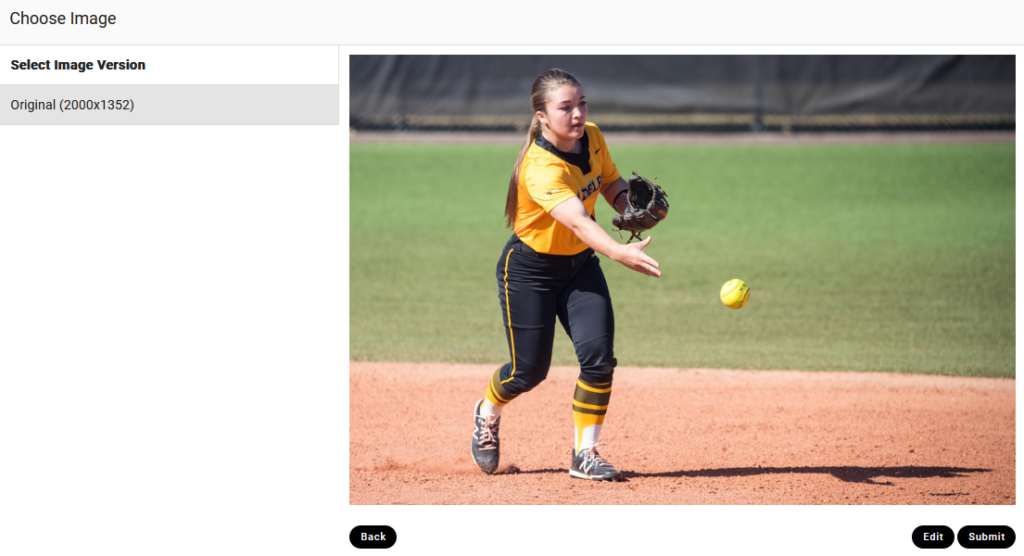
Step 1: Choose an Image

Step 2: Edit the Image

Step 3: Click Finish to Create the Version

Step 4: Click Submit to use as the Primary Image or in Story Body
Being that this replaces an important function, we will be utilizing a slower release than normal. Sites will begin to see this popping up in early November and the process will continue throughout the month. This will then make its way onto the conference platform in early December.


